Thursday 27 April 2017

My Pledge for Me Made May 2017

Well, it's almost that fun time of year again, and time to make my Me Made May pledge for 2017. This will be my fourth year participating in this fun sewing community challenge. Thanks so much to Zoe for organising this wonderful event which is in it's eighth year.


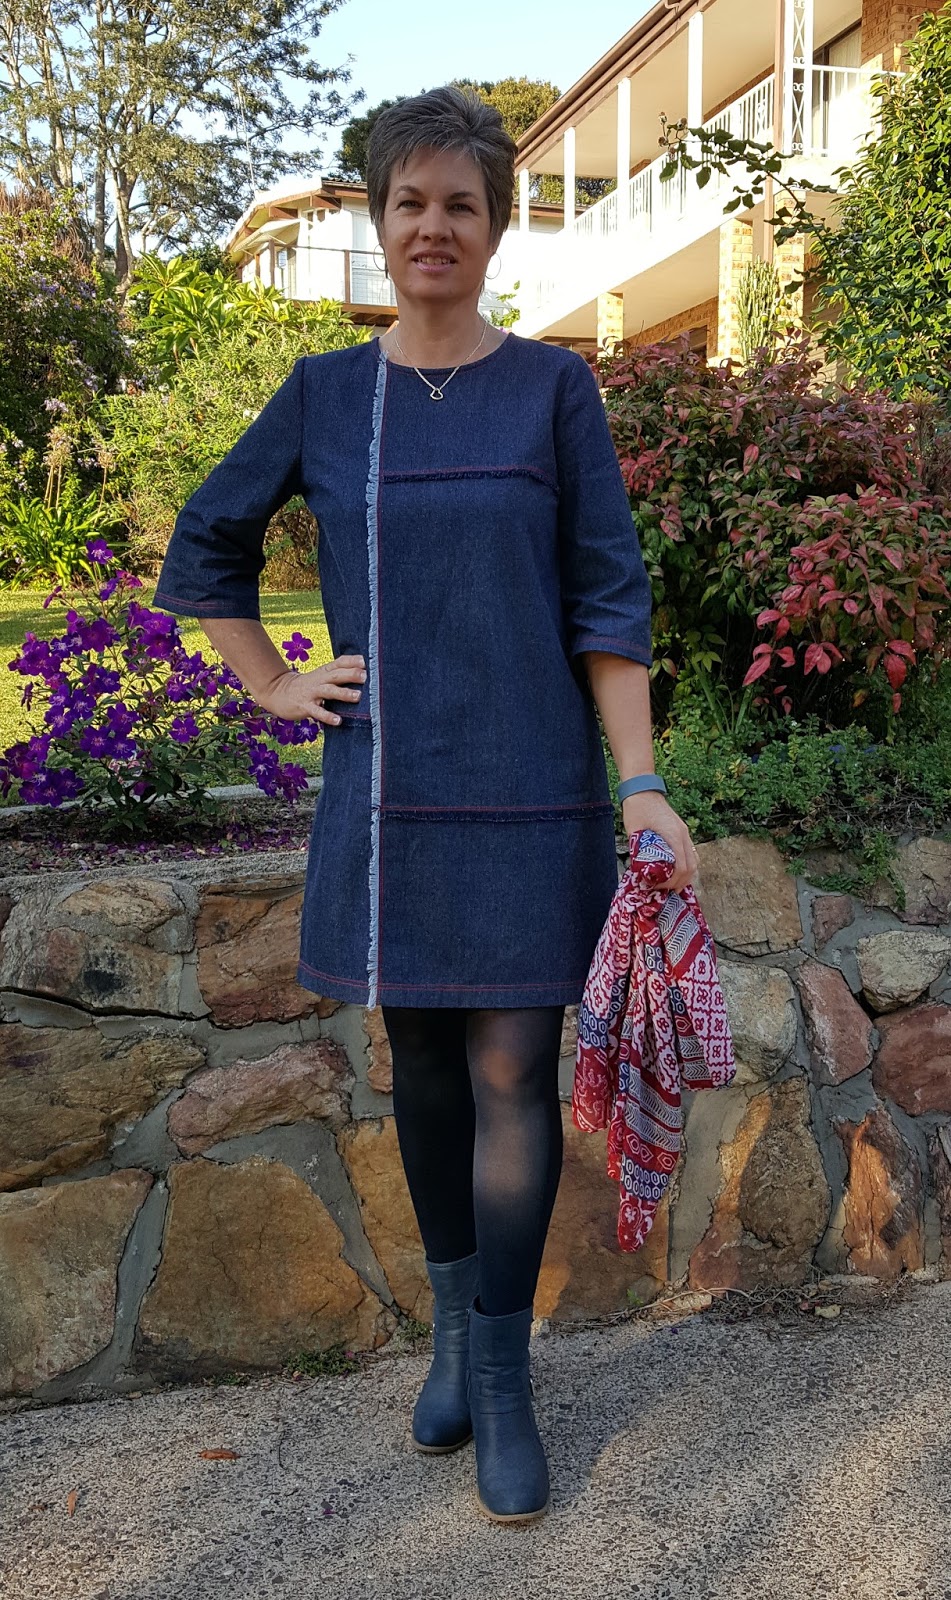
'I, Jean of http://sewjeanmargaret.blogspot.com.au/ and sewjeanmargaret on Instagram, sign up as a participant of Me-Made-May '17. I endeavour to wear only me made garments each day for the duration of May 2017 (excluding underwear, jeans and accessories)'


I will try to post daily photos on Instagram and I may do a weekly round up on the blog. I'm so looking forward to following along with all the other participants this year. Please join in the fun. You can tailor your challenge to suit yourself. This is not a competition, just a bit of sewing fun.

Happy Sewing

Jean

Tuesday 18 April 2017

Style Arc Jema Panel Dress in Denim

Style Arc Jema Panel Dress
This panelled shift dress features a round neck and slight bell shaped sleeves. The panels offer a colour blocking opportunity or the panel seams can be frayed to create an exclusive look.

Style Arc Jema Panel Dress

I could not find any other Jema Panel Dresses on the internet, except for Anne from Clothing Engineer who has done an excellent review of this pattern which I found most helpful. The line drawing is not quite right. The proportions of the panels are different. I moved all the horizontal panel lines (except the top short front panel) down about 10 cm to better reflect the line drawing. I cut a straight size 12 and made no other alterations.


The fabric I used is a light weight denim from Spotlight. I decided to go with the frayed seam lines as a feature. The fringe is a light blue one way, and navy blue on the opposite grainline. I was careful to make sure the light blue fringe would feature on the vertical seam, and the navy fringe on the horizontal seams.


The pattern went together easily, a testament to Style Arc's great drafting skills. This dress was quite simple to construct and I would recommend it for a beginner seamstress. Anne from Clothing Engineer expanded on the technique of lapping the seams before creating the fringe which I found very helpful. I have included a photo of this step to show it clearly.


The lower panel's raw edge must be finished off to avoid fraying. (I overlocked mine). Mark a line 2cm from the finished edge. Mark a line 1cm from the raw edge of the upper panel that will be frayed. Now lap the upper panel over the lower panel, lining the raw edge up with the marked line on the lower panel. Pin and stitch along the line marked on the upper panel. Then stitch another line parallel to the stitching line.


Red thread was used for the entire construction of this dress, as I thought it would be a fun contrast, and I was too lazy to bother changing threads between sewing seams and top stitching. For the top stitching I used a triple stitch to make it stand out and I am really pleased with how this worked out.


I sewed this dress in a few stints over the Easter break and I found creating the fringe to be very time consuming, but I do like the effect. I opted to turn up the hem, and the sleeve hems and top stitch with two rows of triple stitch, rather than finishing off with a fringe.


I sewed the sleeves in flat, before sewing the side seams and sleeve seams all in one go. The sleeves eased in effortlessly. I only needed to run one row of gathering stitches around the sleeve head to ease it into the armscye. I eliminated the back neck opening as it was unnecessary and the neckline is finished off with a double inside binding and top stitched. I also added a decorative top stitch on the shoulder seams and the centre back seam.


After wearing this dress all day today, I am a little disappointed in how it has bagged out in the seat and is sticking out strangley at the lower front, probably due to me sitting all day at work. This fabric may have been a little too stiff for this pattern and a fabric with a little more drape may have worked better. Oh well, you win some, you lose some. Now onto the next project...

Happy Sewing

Jean

Sunday 2 April 2017

Style Arc Hedy Designer Dress in Blue Bamboo Print

Style Arc Hedy Designer Dress

This is the Style Arc Hedy Designer Dress in the longer calf length version. I have made the shorter version previously here. I cut a straight size 12 with no alterations at all. The line drawing is a little misleading as the sleeve length finishes above the elbow and is definitely not 3/4 length as the illustration shows.

Style Arc Hedy Designer Dress

I am loving this longer version. It feels very elegant to wear. The fabric is a poly/spandex knit from Knitwit. I can't find it on the website today so I assume they have sold out. It's a lovely quality fabric with the perfect drape for this style. Also, no ironing required which makes it the perfect travel dress.


The fabric is thin which is ideal for this pattern, because the crossover fold at the front is several layers thick and can end up quite bulky if a thicker fabric is used. I had this problem with my first version, but this one was smooth sailing.


The design lines get a bit lost in this gorgeous bamboo print but I am happy with the overall look of the dress.


A close up view of the front cross over fold at the neckline. The neckline is finished off with a facing and it sits beautifully in this poly/spandex knit. I secured the facing with a few hand stitches at each seam allowance around the neckline, so it doesn't flip out at all.


A close up view of the side seam and front in seam pocket. This is such a clever design and comes together very nicely.


There are side slits at the hem line for walking ease. I over locked the raw edges of the side seams, before sewing the side seams with my sewing machine. The seam allowances were then pressed open and the side slits top stitched. The hems were all cover stitched.


The shape of the dress with arms out stretched is quite voluminous but the fabric drapes beautifully with your arms in the usual position.


I wore this dress out to dinner with my hubby for date night, last night. I felt elegant, stylish and comfortable so I guess it's a winner.

Happy Sewing

Jean